Issue and approve certificates with Venafi Control Plane
Learn how to configure Venafi Control Plane, cert-manager, approver-policy-enterprise, and venafi-enhanced-issuer so that application teams can help themselves to SSL certificates which comply with enterprise PKI policy.
Create a Test Certificate
Now that you've installed all the prerequisite software in your cluster and configured an issuer, it's time to create an SSL certificate.
First create a Certificate and see that it is not approved.
apiVersion: v1kind: Namespacemetadata:name: application-team-1---apiVersion: cert-manager.io/v1kind: Certificatemetadata:name: certificate-1namespace: application-team-1spec:commonName: app1.example.comsecretName: certificate-1issuerRef:name: application-team-1kind: VenafiClusterIssuergroup: jetstack.io
kubectl apply -f certificate.yaml
You will notice that a CertificateRequest is created, but it is neither approver nor denied:
$ kubectl -n application-team-1 get crNAME APPROVED DENIED READY ISSUER REQUESTOR AGEcertificate-1-tdc74 application-team-1 system:serviceaccount:jetstack-secure:cert-manager 21s
This is because we disabled the default cert-manager approver controller when we installed cert-manager earlier. And we have not yet created a policy for the approver-policy component.
$ kubectl -n application-team-1 describe cr...Events:Type Reason Age From Message---- ------ ---- ---- -------Normal Unprocessed 3m54s policy.cert-manager.io Request is not applicable for any policy so ignoring
Create an Approval Policy
apiVersion: policy.cert-manager.io/v1alpha1kind: CertificateRequestPolicymetadata:name: application-team-1spec:allowed:commonName:value: "*"plugins:venafi:values:venafiConnectionName: application-team-1-connectionzone: \VED\Policy\Teams\application-team-1selector:issuerRef:name: application-team-1kind: VenafiClusterIssuergroup: jetstack.ionamespace:matchNames:- application-team-1---apiVersion: rbac.authorization.k8s.io/v1kind: ClusterRolemetadata:name: cert-manager-policy:application-team-1rules:- apiGroups: ["policy.cert-manager.io"]resources: ["certificaterequestpolicies"]verbs: ["use"]resourceNames: ["application-team-1"]---apiVersion: rbac.authorization.k8s.io/v1kind: ClusterRoleBindingmetadata:name: cert-manager-policy:application-team-1roleRef:apiGroup: rbac.authorization.k8s.iokind: ClusterRolename: cert-manager-policy:application-team-1subjects:- kind: ServiceAccountname: cert-managernamespace: jetstack-secure
kubectl apply -f policy.yaml
After applying the CertificateRequestPolicy you will see that the CertificateRequest for your test Certificate is approved.
$ kubectl -n application-team-1 get certificaterequest certificate-1-q65m6NAME APPROVED DENIED READY ISSUER REQUESTOR AGEcertificate-1-q65m6 True True application-team-1 system:serviceaccount:jetstack-secure:cert-manager 38m
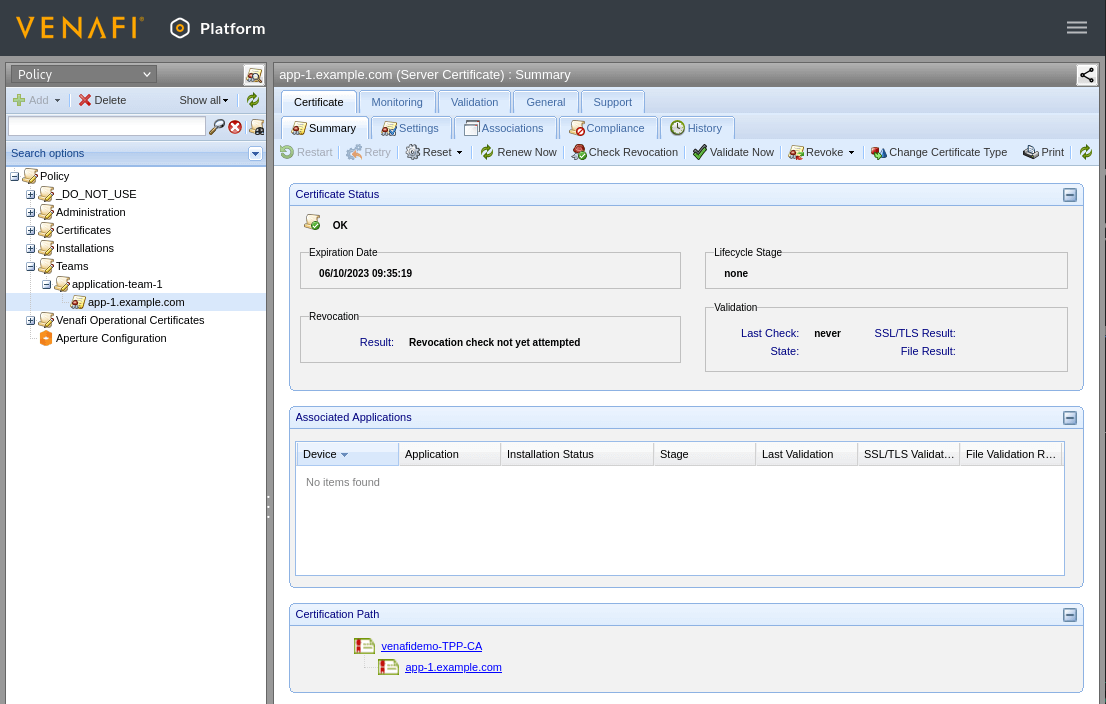
And once it has been Approved, the CertificateRequest will be reconciled by venafi-enhanced-issuer, which will send the CertificateRequest data to Venafi TPP and get the signed SSL certificate, which cert-manager will then put in the Secret along side the private key.
$ kubectl -n application-team-1 describe secrets certificate-1Name: certificate-1Namespace: application-team-1...Type: kubernetes.io/tlsData====tls.crt: 3218 bytestls.key: 1679 bytes
And you will see the certificate in the Venafi TPP policy folder: