Configuring and applying an issuer
Issuer configuration
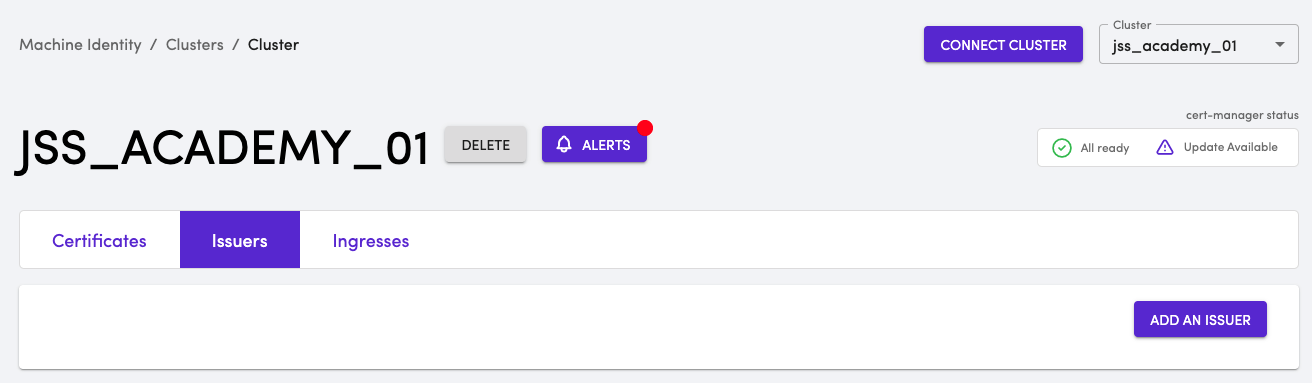
Access the TLS Protect for Kubernetes Dashboard and click on the cluster that you are interested in. The default view shows all the certificates in the cluster. Click on the Issuers tab to configure an issuer.
If this is the first time a issuer is being created in the cluster, you will see an empty list. Click on Add Issuer
Adding an issuer
Adding an Issuer or ClusterIssuer involves various considerations to be made. The first section of adding an issuer is pretty straight-forward as it asks you provide a name and and the type of issuer this is going to be. You have a choice of Issuer or Cluster-wide Issuer
- Provide the issuer name as academy-issuer
- Choose Namespaced issuer and provide the name for namespace as jss-academy

The next section of the issuer configuration provides you a list of issuers that can be configured. The list at the time of this writing shows,
- ACME
- AWS Private CA
- Google CAS
- Venafi Cloud & TPP
- Vault
As you can imagine, each of this issuer has its own configuration. Depending on which issuer you pick, the information that needs to be provided will be different. In some cases, like Venafi Cloud & TPP, there are different configuration requirements for Venafi Cloud and TPP (Trust Protection Platform). TLS Protect for Kubernetes makes it simple by presenting with configuration that is required for each issuer.
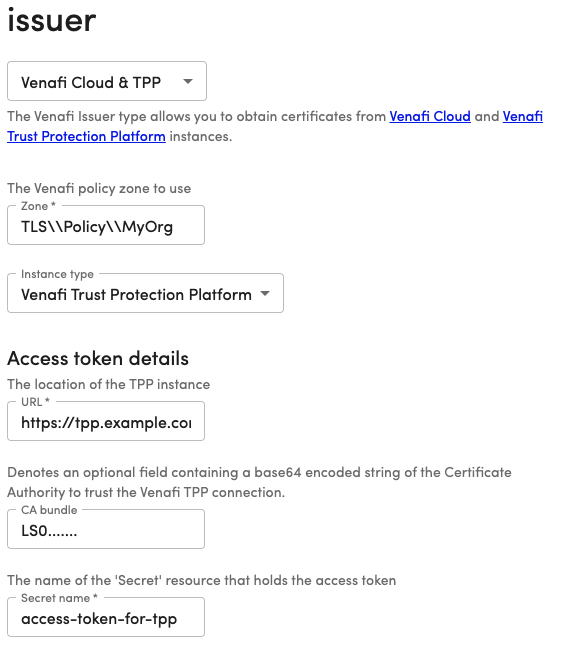
In this course, we will create a issuer for Venafi TPP. As such, we will choose Venafi Cloud & TPP in the drop-down.
- The Zone field represents the policy folder in Venafi Trust Protection Platform
- The Instance Type will be Venafi Trust Protection Platform
- The URL will be the URL of the TPP instance
- The CA Bundle will be the base64 encoded value of certificate associated with the TPP instance
- The Secret name is the Kubernetes secret resource that holds the access-token required to access the TPP instance.
More information about issuer configuration is available here
Scroll down on your TLS Protect for Kubernetes dashboard issuer configuration page to find the step by step details to to setup the issuer. The dashboard walks through the exact steps to
- Setting up an auth token
- Creating an user
- Creating an application integration in Venafi
- Creating a secret in Kubernetes
- Finally, creating an issuer in Kubernetes
As mentioned before, each issuer has it's own configuration and the steps will vary depending on the selected issuer. Some may have a few steps and others may have some pre-requisites. Change the issuer configuration to what suits best for you. If you have access to a Vault instance, choose Vault , or if you want to try with LetsEncrypt, try the ACME issuer.
Finally, run
kubectl get issuer academy-issuer --namespace='jss-academy' -o wide
You should see status as Venafi issuer started
NAME READY STATUS AGEacademy-issuer True Venafi issuer started 15s
The TLS Protect for Kubernetes Dashboard will now list the issuer in the Issuers page, and on clicking the issuer will also display the issuer configuration.
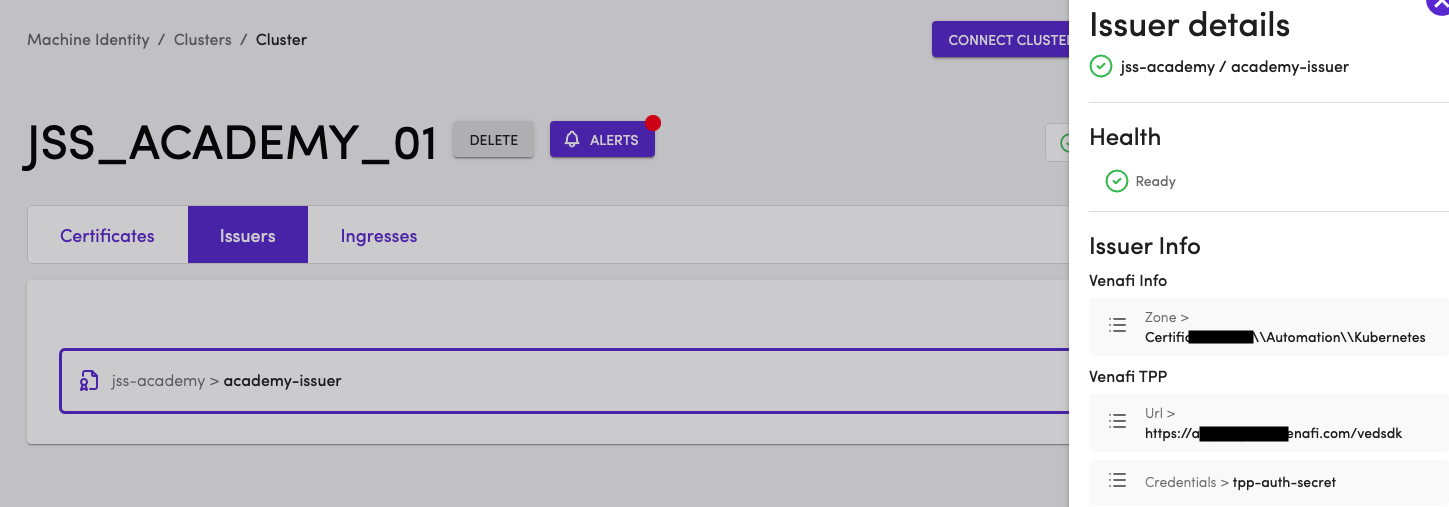
We now have an Issuer in jss-academy namespace to issue certificates for workloads configured in the namespace!