Installation of cert-discovery-venafi
Prerequisites
This course assumes that you have access to a Venafi Trust Protection Platform (TPP) instance. cert-discovery-venafi is tested using Venafi TPP 20.4, and is known to work on TPP 21.0 and above.
To be able to use cert-discovery-venafi, you need to have access to a Kubernetes cluster. cert-discovery-venafi tool will require access to all Secret resources in your cluster.
The course also assumes that you have been given a TLS Protect for Kubernetes JSON key file named json-key.json. This file will be used to access the container images and Helm charts stored in the container registry eu.gcr.io/jetstack-secure-enterprise.
Assumptions
Before continuing, make sure you have kubectl, helm, and vcert installed on your machine.
Setup access to the container registry and Helm charts
The first step is to create a Secret resource containing the Jetstack Secure JSON key. This step assumes the file json-key.json is present in the current directory. Run the following command:
kubectl create namespace jetstack-securekubectl create secret docker-registry jetstack-secure-enterprise \-n jetstack-secure \--docker-server=https://eu.gcr.io \--docker-username=\_json_key \--docker-email=unused@example.com \--docker-password="$(cat json-key.json)"
Note: the email address unused@example.com is a dummy email address. Since we are using a JSON key, the email does not matter.
The second step is to give the helm CLI access to the Helm chart. Run the following command:
helm registry login -u _json_key --password-stdin eu.gcr.io <json-key.json
Get an access token from Venafi TPP
In this step, we will be creating a token by navigating the Venafi TPP UI. cert-discovery-venafi requires an access token to communicate with your Venafi TPP instance. In this step, it is assumed that you have access to a username and password to be able to log into your Venafi TPP instance.
We want to navigate to the Venafi TPP "API Application" page:
https://your-tpp-url/aperture/application-integrations/
Open the default API Application "VCert SDK", and check that it has the right scopes. The required scopes are certificates:manage,discover. For example, in the following screenshot, we can see that "Managed" and "Discover" are already checked:
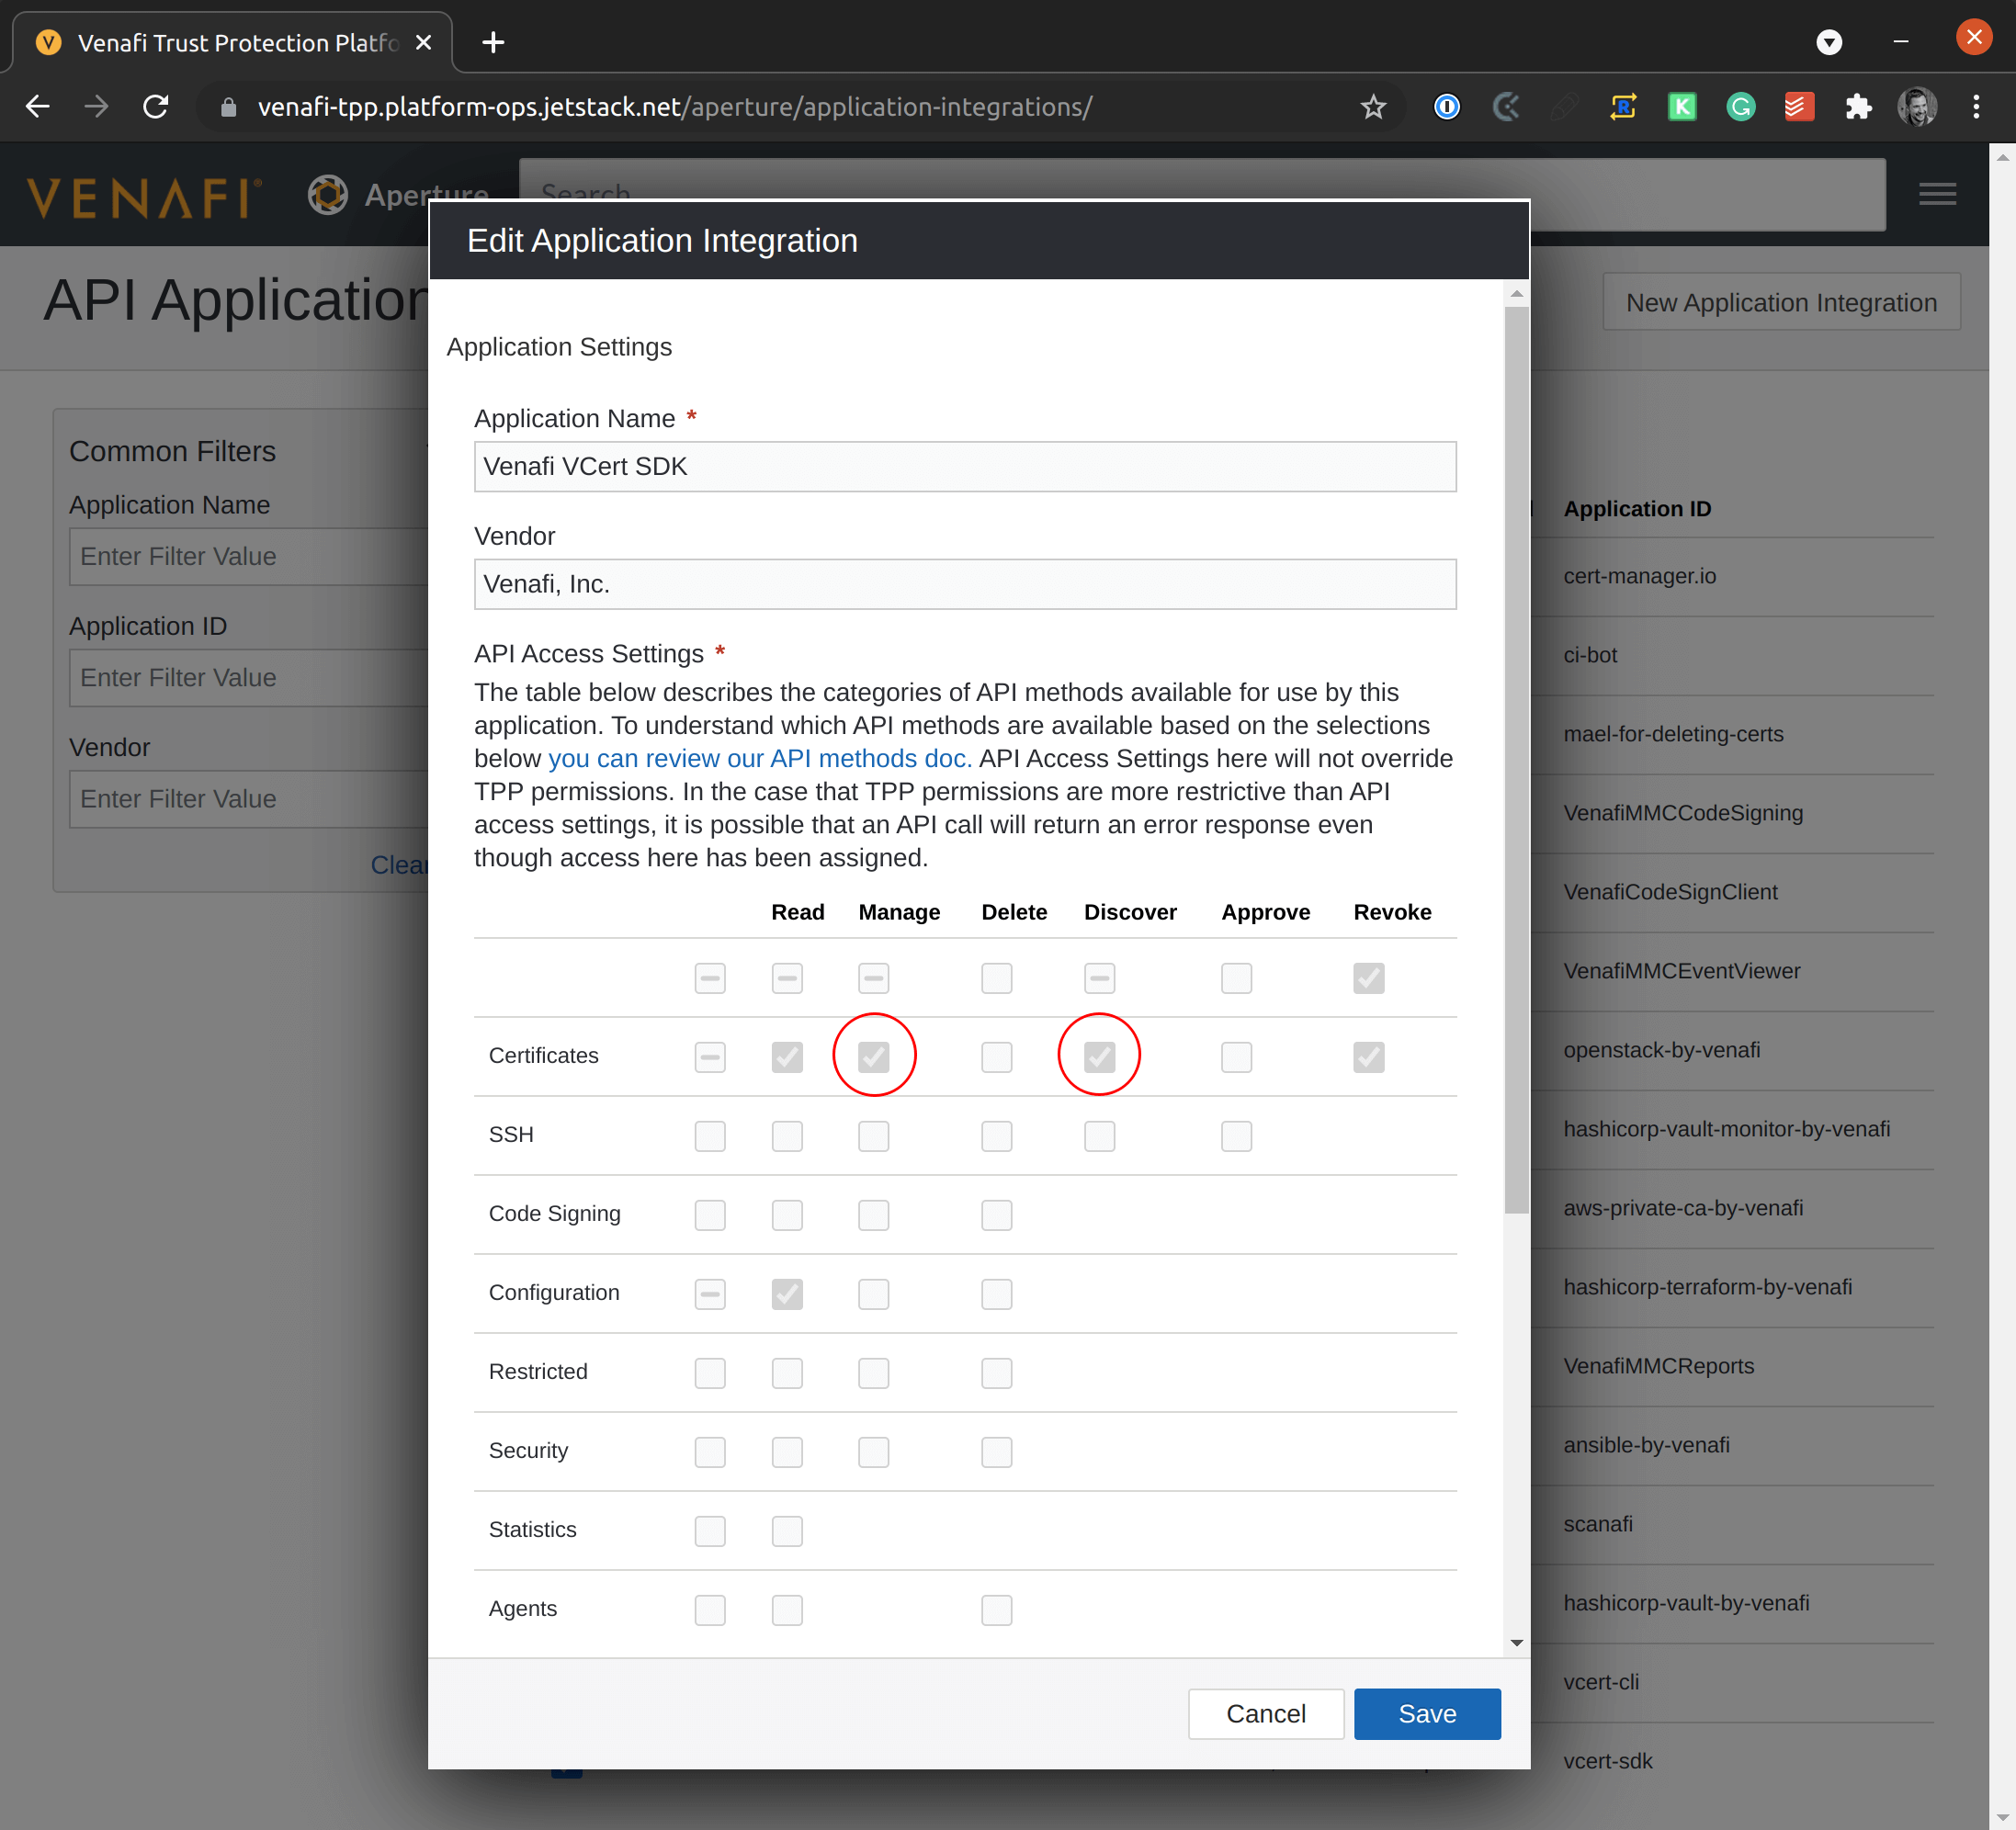
Each API application has an associated "application ID", also called "client ID". This "application ID" is visible in the API Application page. In the case of "VCert SDK", the "client ID" is vcert-sdk. You will use this value to set the variable VENAFI_TPP_CLIENT_ID.
Let us set the a few variables to be used in the next steps:
VENAFI_TPP_URL=https://your-tpp-url/vedsdkVENAFI_TPP_USERNAME=usernameVENAFI_TPP_PASSWORD=passwordVENAFI_TPP_CLIENT_ID=vcert-sdkVENAFI_TPP_ZONE='Your\Zone'
Note: the term "zone" as used in the below VENAFI_TPP_ZONE variable is equivalent to the term "policy folder". The term "policy folder" is often used in Venafi TPP, and the term "zone" is the term used in Venafi Cloud.
You can now request an access token with the following command:
TOKEN=$(vcert getcred -u $VENAFI_TPP_URL \--username $VENAFI_TPP_USERNAME \--password $VENAFI_TPP_PASSWORD \--client-id=$VENAFI_TPP_CLIENT_ID \--scope=certificate:manage,discover \--format json | jq -r .access_token)
Finally, create the Kubernetes Secret that will contain the access token:
kubectl create secret generic access-token \-n jetstack-secure \--from-literal=access-token="$TOKEN"
Deploying cert-discovery-venafi using Helm
You can now install cert-discovery-venafi using Helm:
helm upgrade --install cert-discovery-venafi \oci://eu.gcr.io/jetstack-secure-enterprise/charts/cert-discovery-venafi \--registry-config <(jsctl registry auth output --format=dockerconfig) \--version 0.1.0 \--namespace jetstack-secure \--set url="$VENAFI_TPP_URL" --set zone="$VENAFI_TPP_ZONE"
Note that Helm 3.8 or above is required to be able to use the oci:// protocol. If you are using Helm 3.7, you can still use the feature by setting HELM_EXPERIMENTAL_OCI=1. Alternatively, you can download the cert-discovery-venafi.tgz Helm package on the releases page.
Verifying that certificates are being pushed to Venafi TPP
After installing, cert-discovery-venafi starts importing TLS Secrets into your Venafi TPP instance under the policy folder that you specified with the variable VENAFI_TPP_ZONE. You can open the Venafi TPP UI to check that the certificates have been imported.
This is the end of this course. Through this course, you learned how cert-discovery-venafi can help you solve the issue of certificate discovery throughout your Kubernetes clusters, and how to install cert-discovery-venafi.