Issue and approve certificates with Venafi Control Plane
Learn how to configure Venafi Control Plane, cert-manager, approver-policy-enterprise, and venafi-enhanced-issuer so that application teams can help themselves to SSL certificates which comply with enterprise PKI policy.
Option 1: Configure Venafi Control Plane (VaaS)
In this tutorial it is assumed that you are logged into VaaS using the profile that will be used for the integration
Retrieve your API key
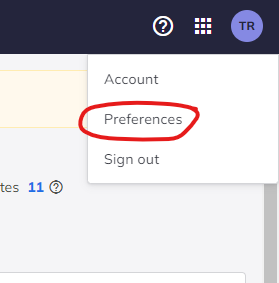
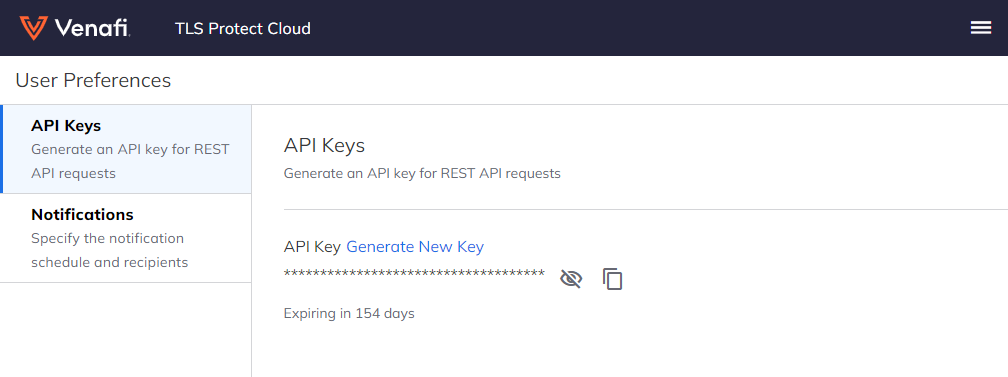
Go to the Venafi Control Plane (VaaS) and navigate to the "Preferences" user account page. On this page, you can generate and copy an API key.
Option 2: Configure Venafi Control Plane for Datacenters (TPP)
In this tutorial it is assumed that your application teams have their own user account and policy folder in Venafi TPP.
Create a User Account
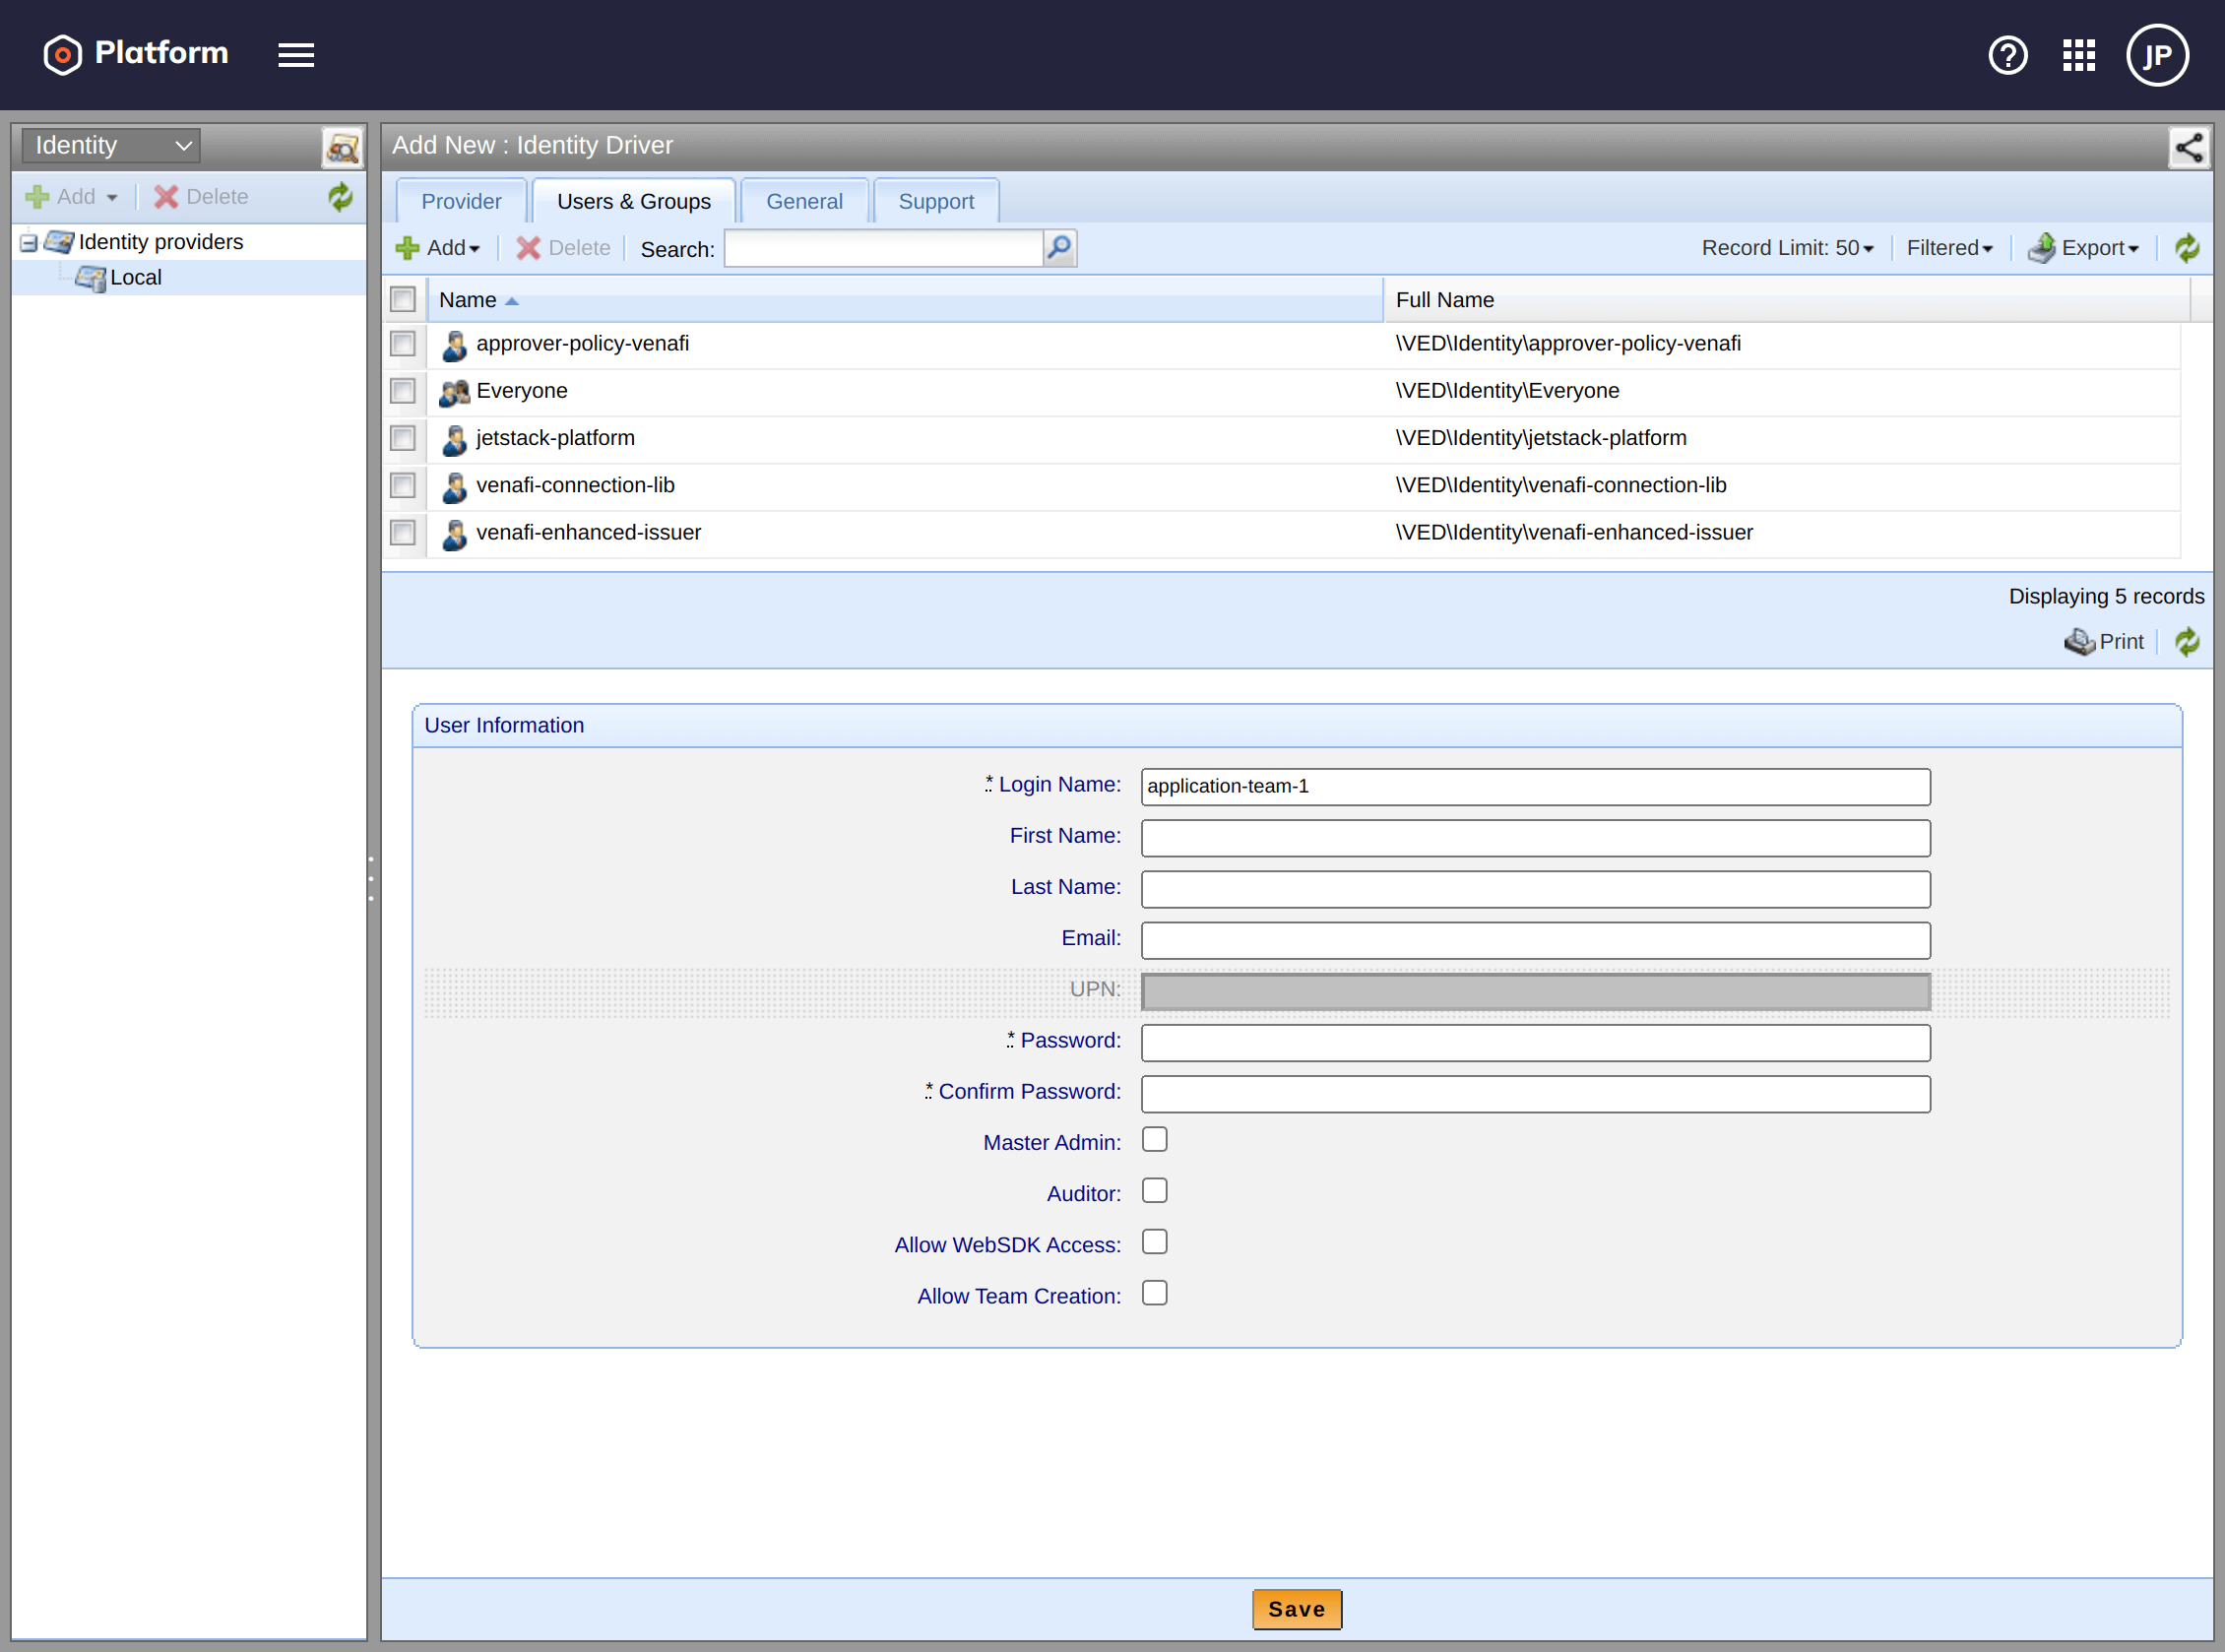
Create a user account and generate a strong random password. In this example, we create the user name application-team-1.
Keep the username / password safely for later when you will need to share it with platform team or upload it to a secret store. You will need to perform this step for every team that requires access to the Venafi TPP API server.
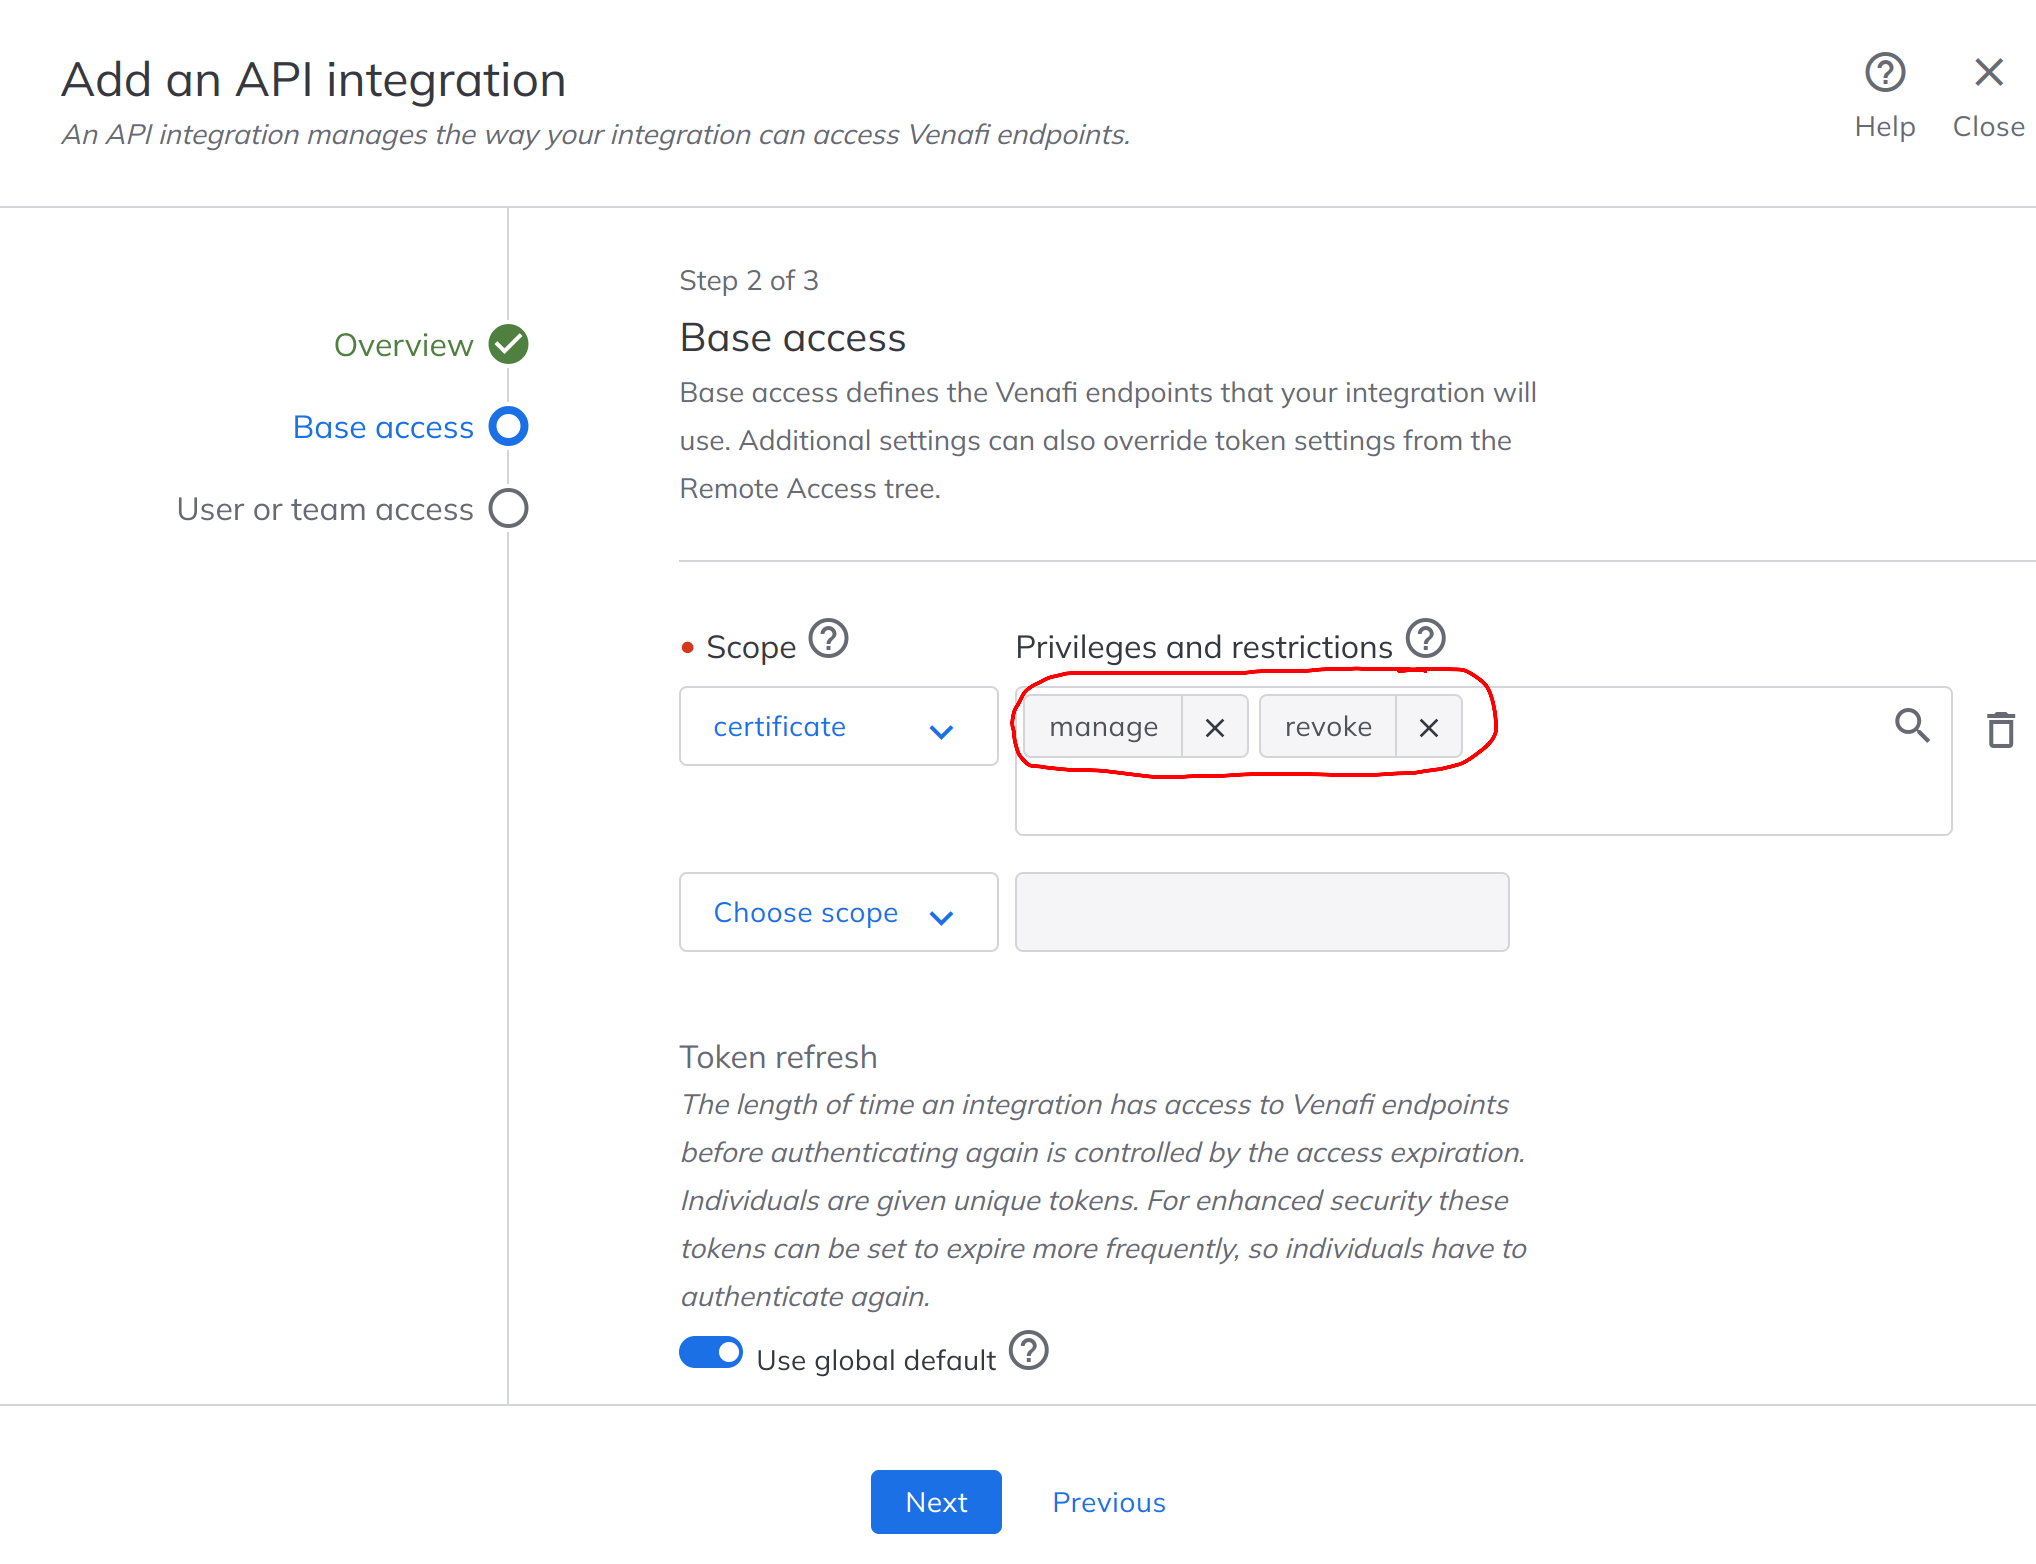
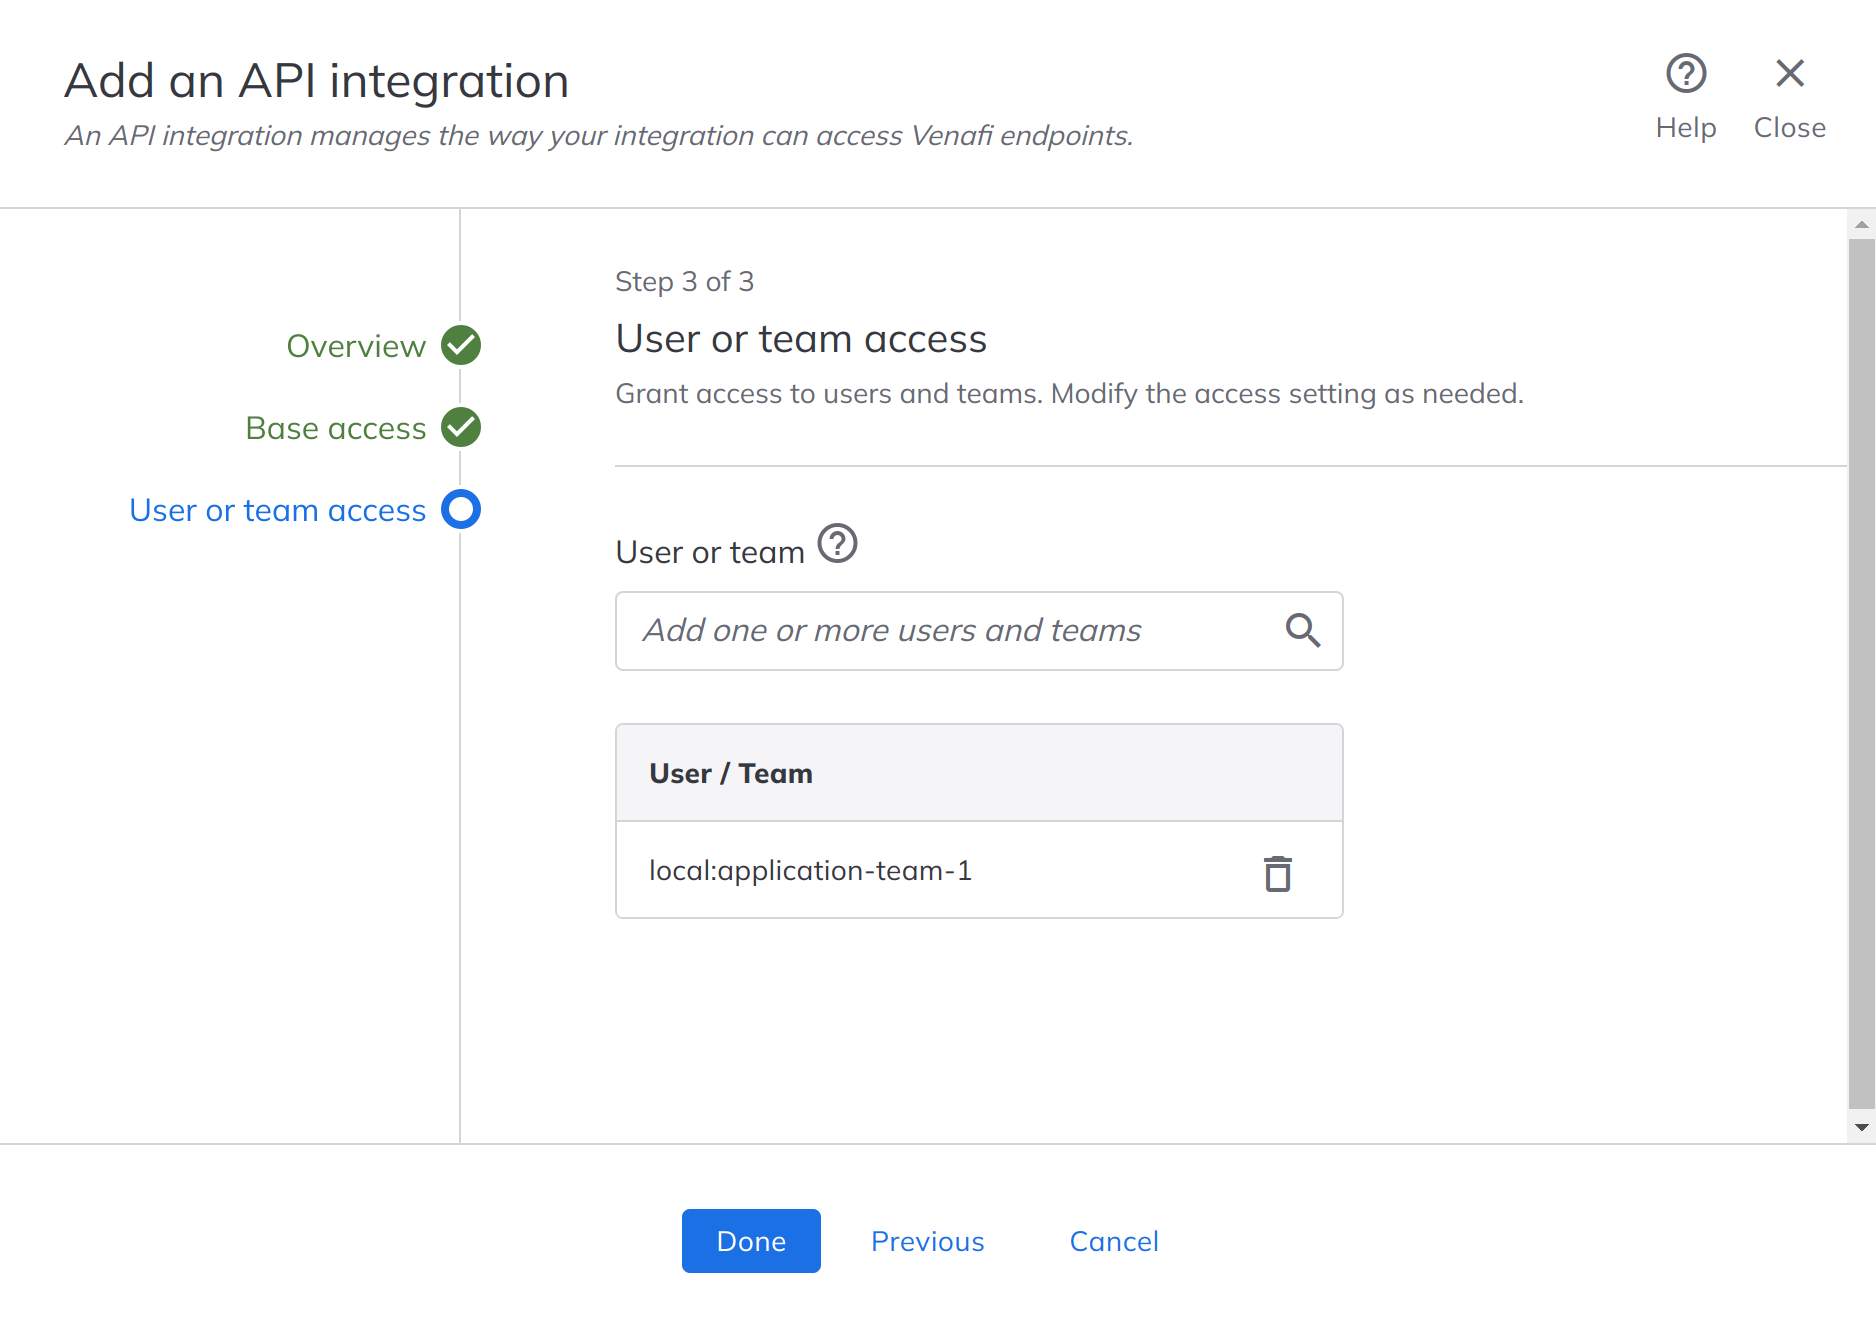
Create an Application Integration
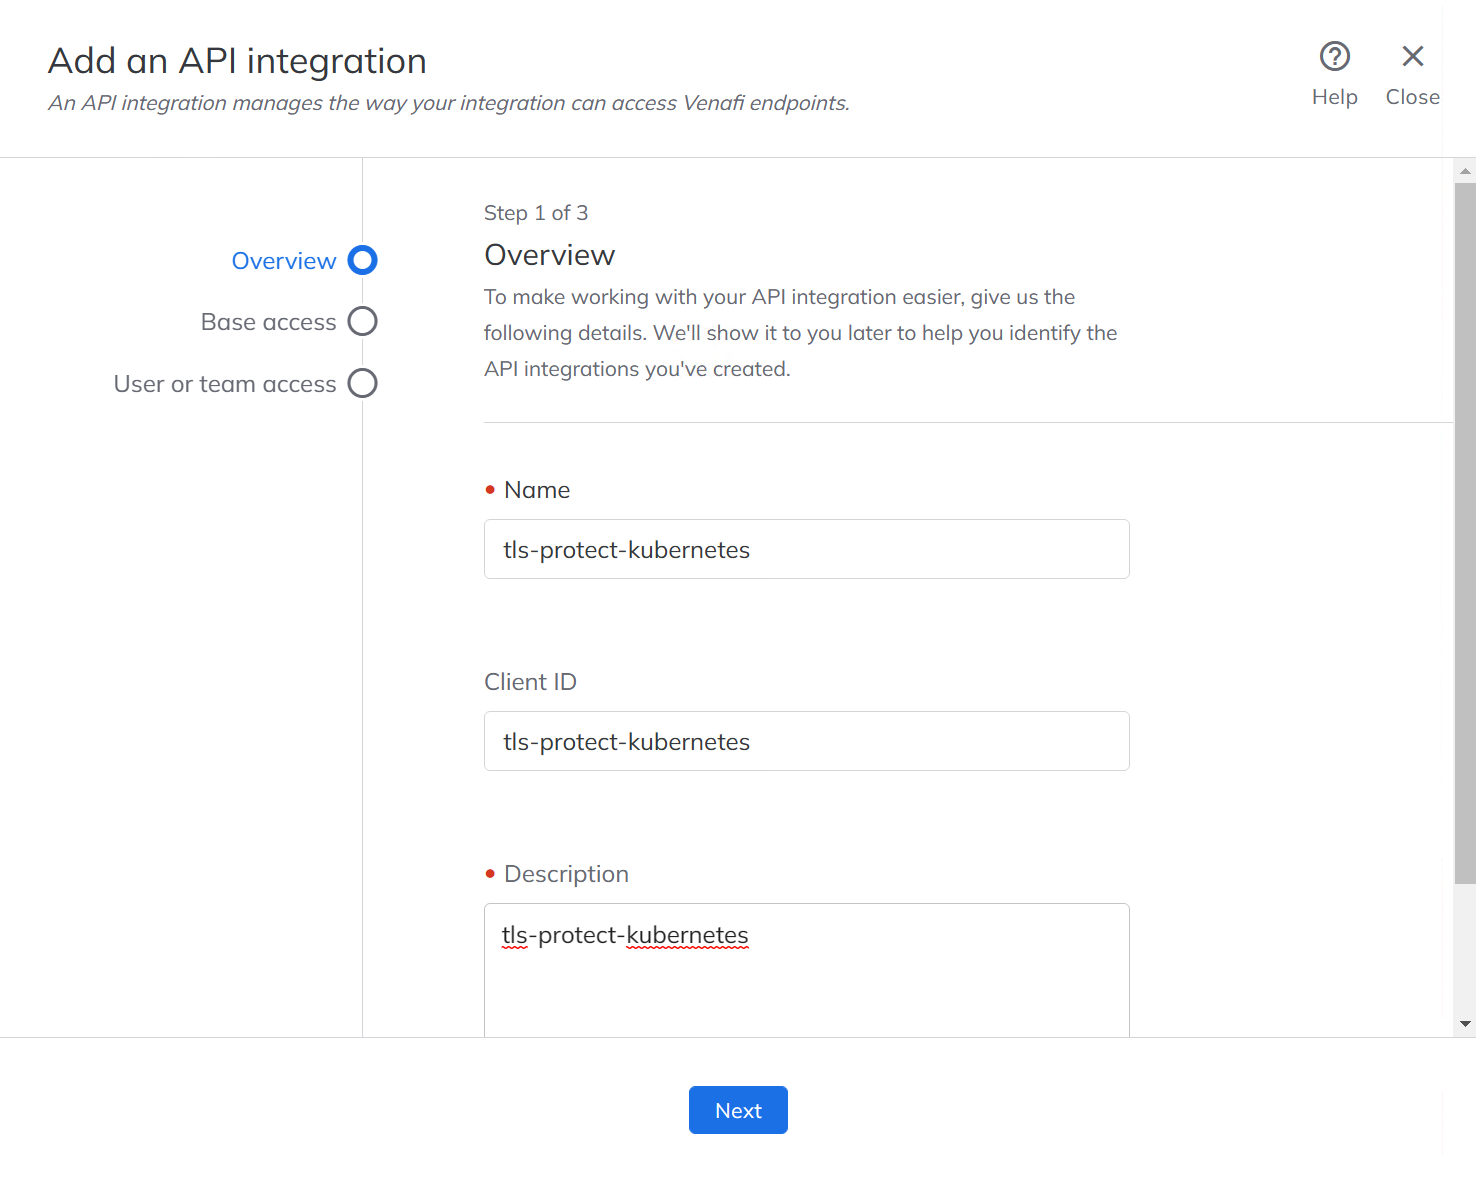
The venafi-enhanced-issuer needs permission to manage certificates using the Venafi TPP API. This is configured by creating an Application Integration
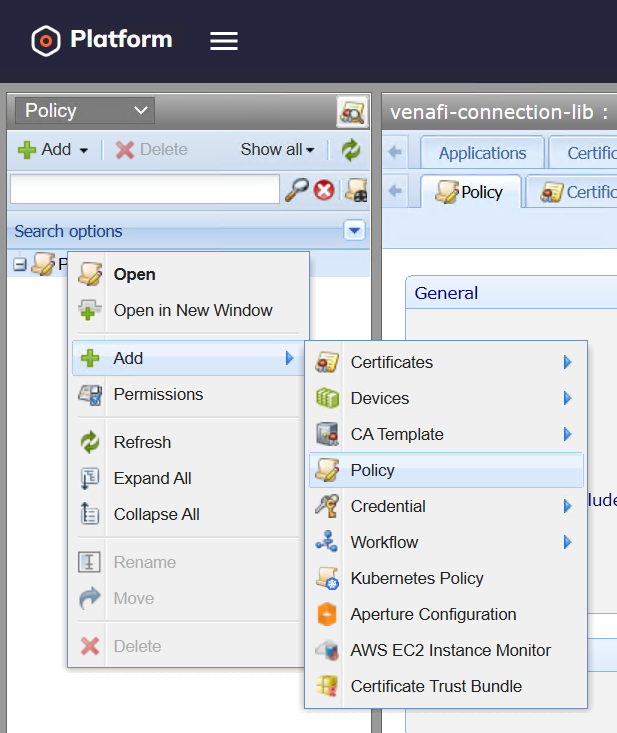
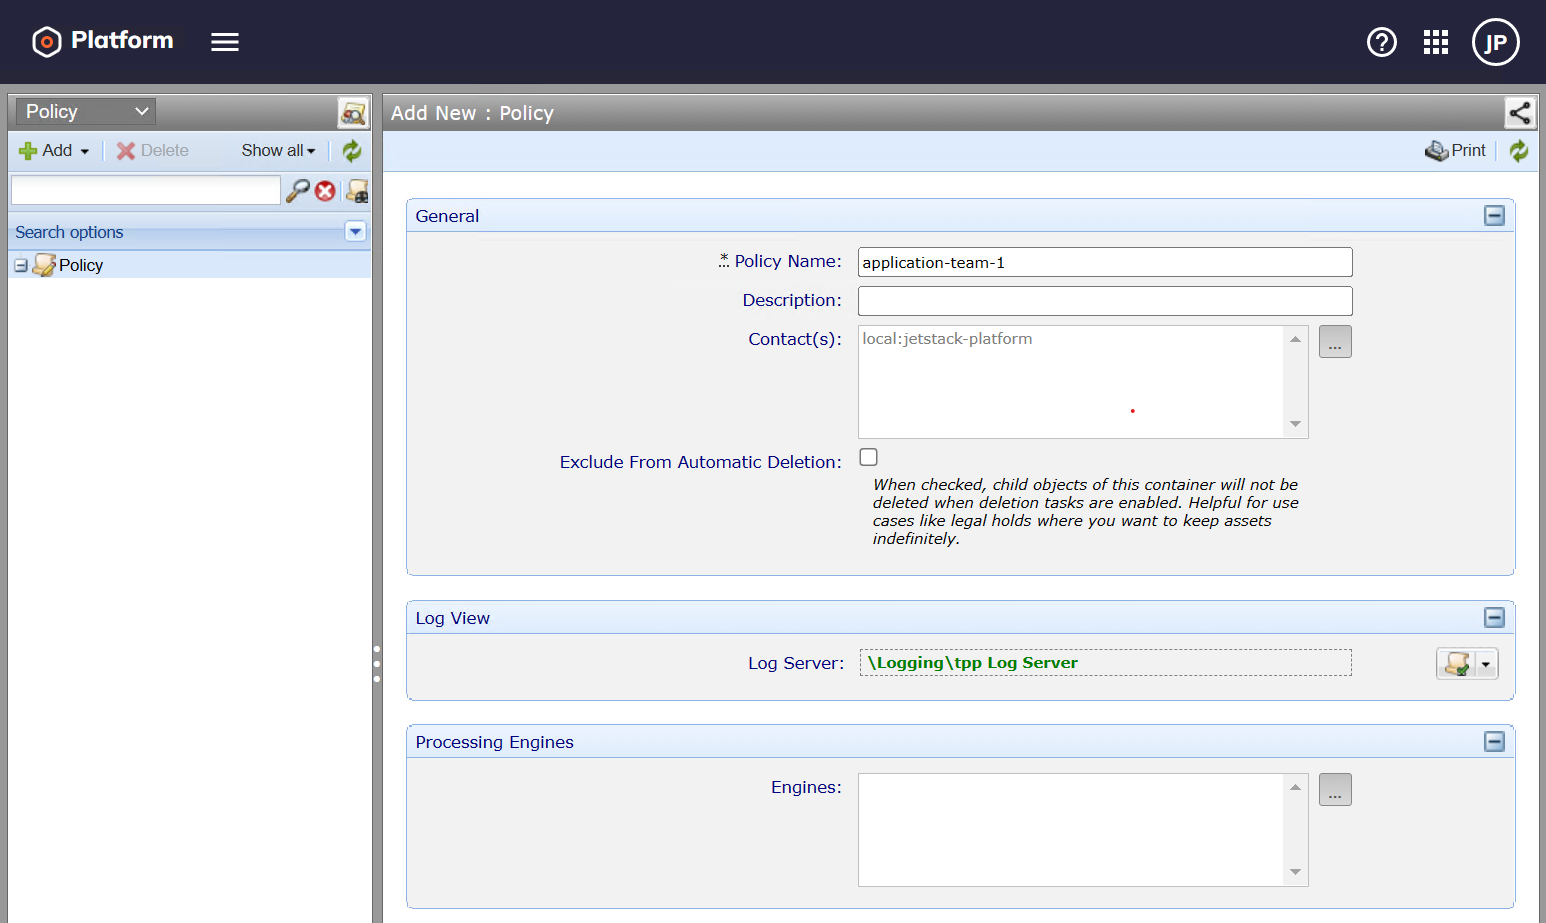
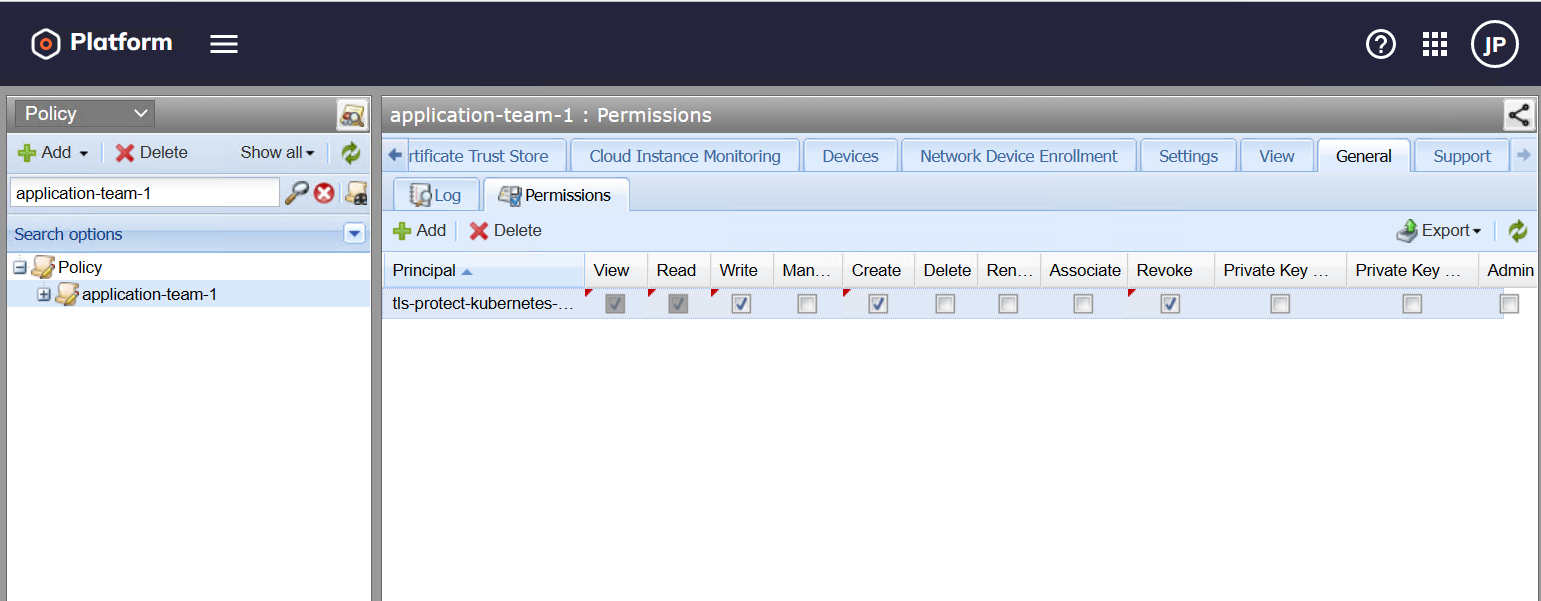
Create a Policy Folder
Grant the User Access to the Policy Folder
(Optional) Create the JWT Mapping
This step is only required if you plan on using the secretless JWT Mapping authentication method. This method is limited to TLS Protect Datacenter (TPP) 22.4 and above. TLS Protect Cloud (VaaS) is not yet supported.
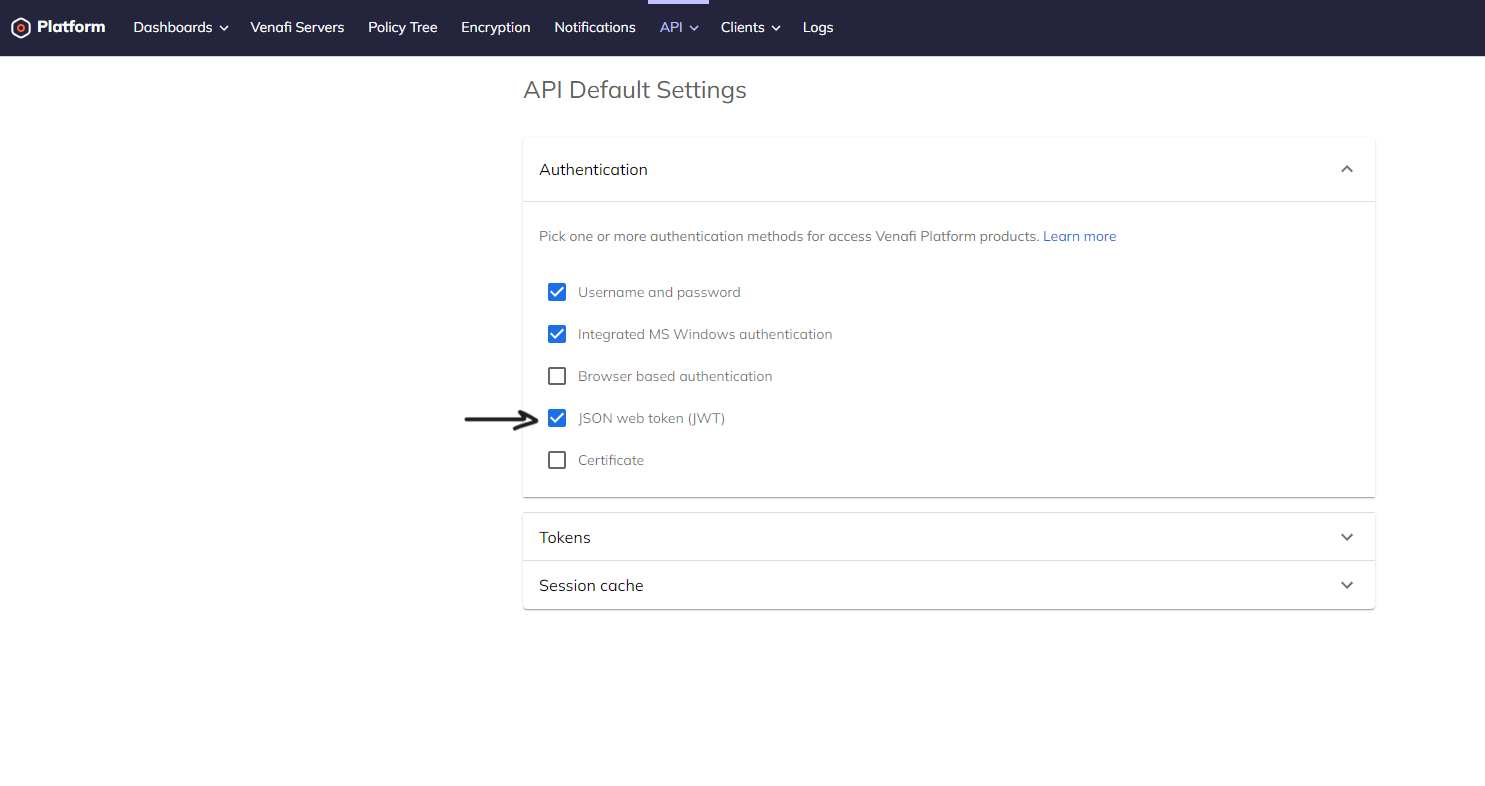
First, you must enable the JWT authentication method. This can be done through the UI by going to Platform > API > Default Settings > JSON web token (JWT).
You will need to create one JWT Mapping for each user account and per Kubernetes cluster.
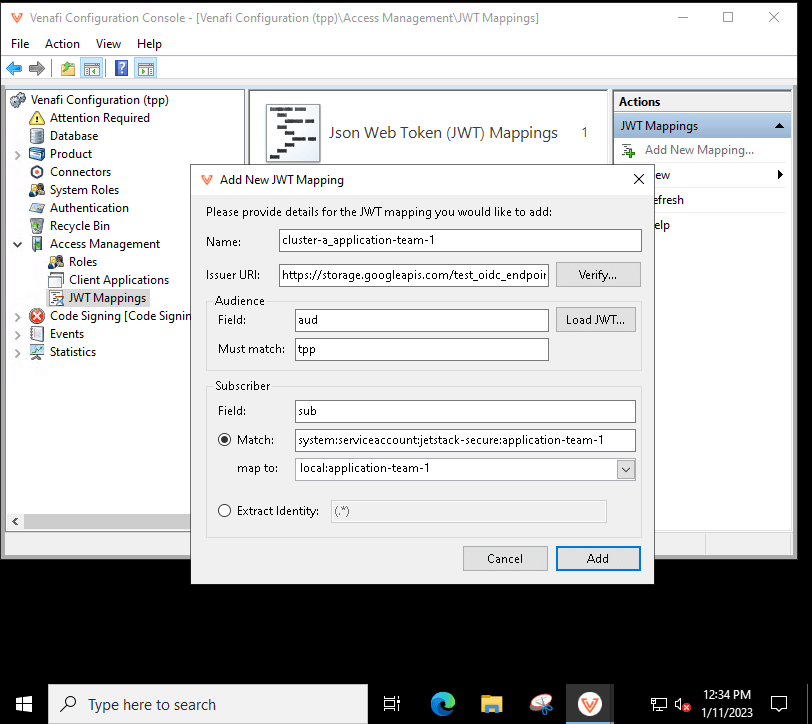
To add a JWT Mapping, you will have to RDP into the TPP instance and open the Venafi Configuration Console. TPP 22.4 only supports configuring JWT Mappings through the Venafi Configuration Console, and not through the UI.
You will need to know the issuer URL of the given Kubernetes cluster. You can find that by running the following command:
kubectl get --raw /.well-known/openid-configuration | jq .issuer -r
In the below screenshots, we will assume that the issuer URL is https://storage.googleapis.com/test_oidc_endpoint/.
Now, you can create the JWT Mapping:
-
The name can be anything you want. In this example, we concatenated the Kubernetes cluster name cluster-a with the Kubernetes service account name application-team-1.
-
The audience field is set to aud, and the value must match tpp. This same value will need to be set in the VenafiConnection later on.
-
The subscriber field is set to sub, and the value must match the name of the Kubernetes service account that will be used in the VenafiConnection later on. The format of the name is as follows:
system:serviceaccount:<namespace>:<service-account-name>Copy to clipboardWe recommend that you put all of the Kubernetes service accounts meant to be used with the VenafiConnection in the namespace jetstack-secure.
Next Steps
We present two ways of configuring how to connect to the Venafi Control Plane:
- Create a secretless Venafi Connection using JWT. This method is limited to TLS Protect Datacenter (TPP) 22.4 and above. TLS Protect Cloud (VaaS) is not yet supported.
- Create a Venafi Connection by storing credentials in HashiCorp Vault. This method supports both TLS Protect Cloud (VaaS) and TLS Protect Datacenter (TPP), and requires a Vault instance to store the credentials used to connect to VaaS and TPP.